8.31.2011

Peanut Butter Swirl Brownies


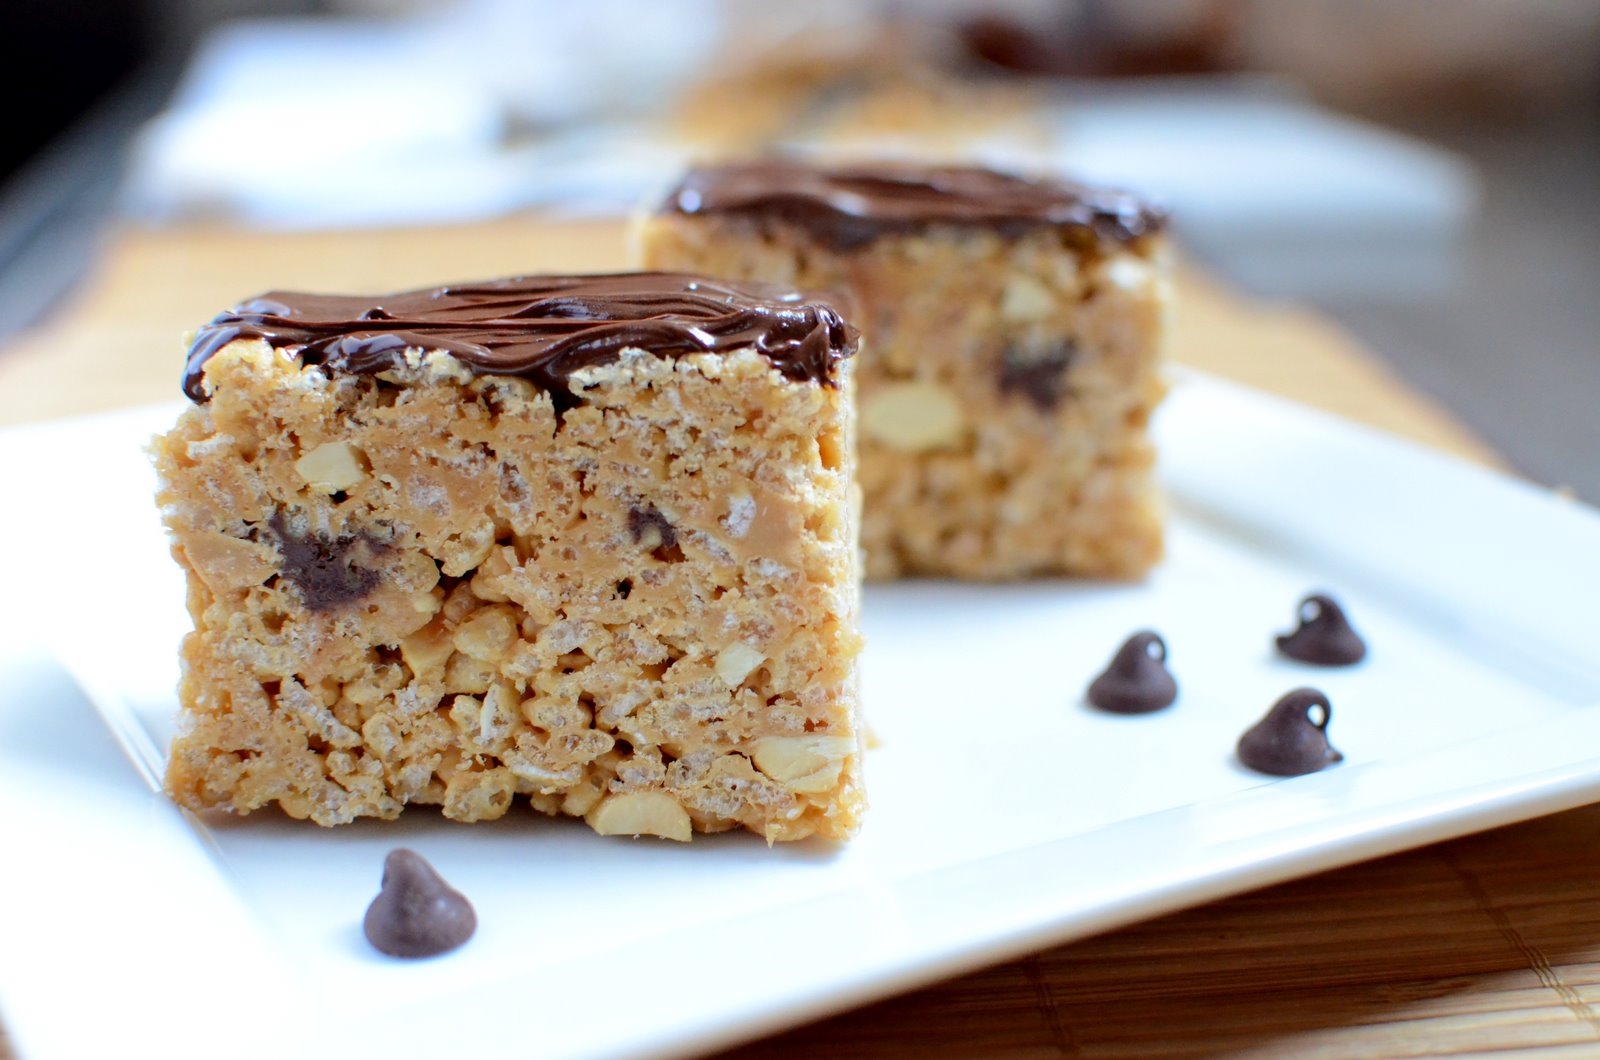
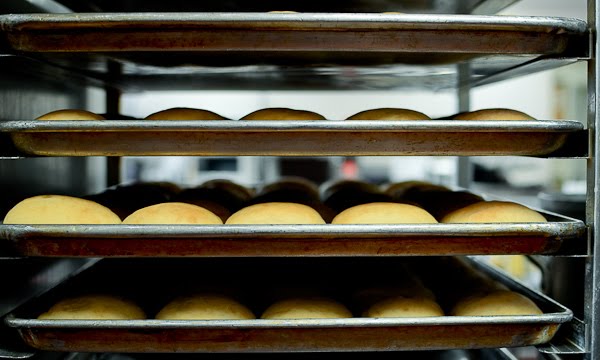
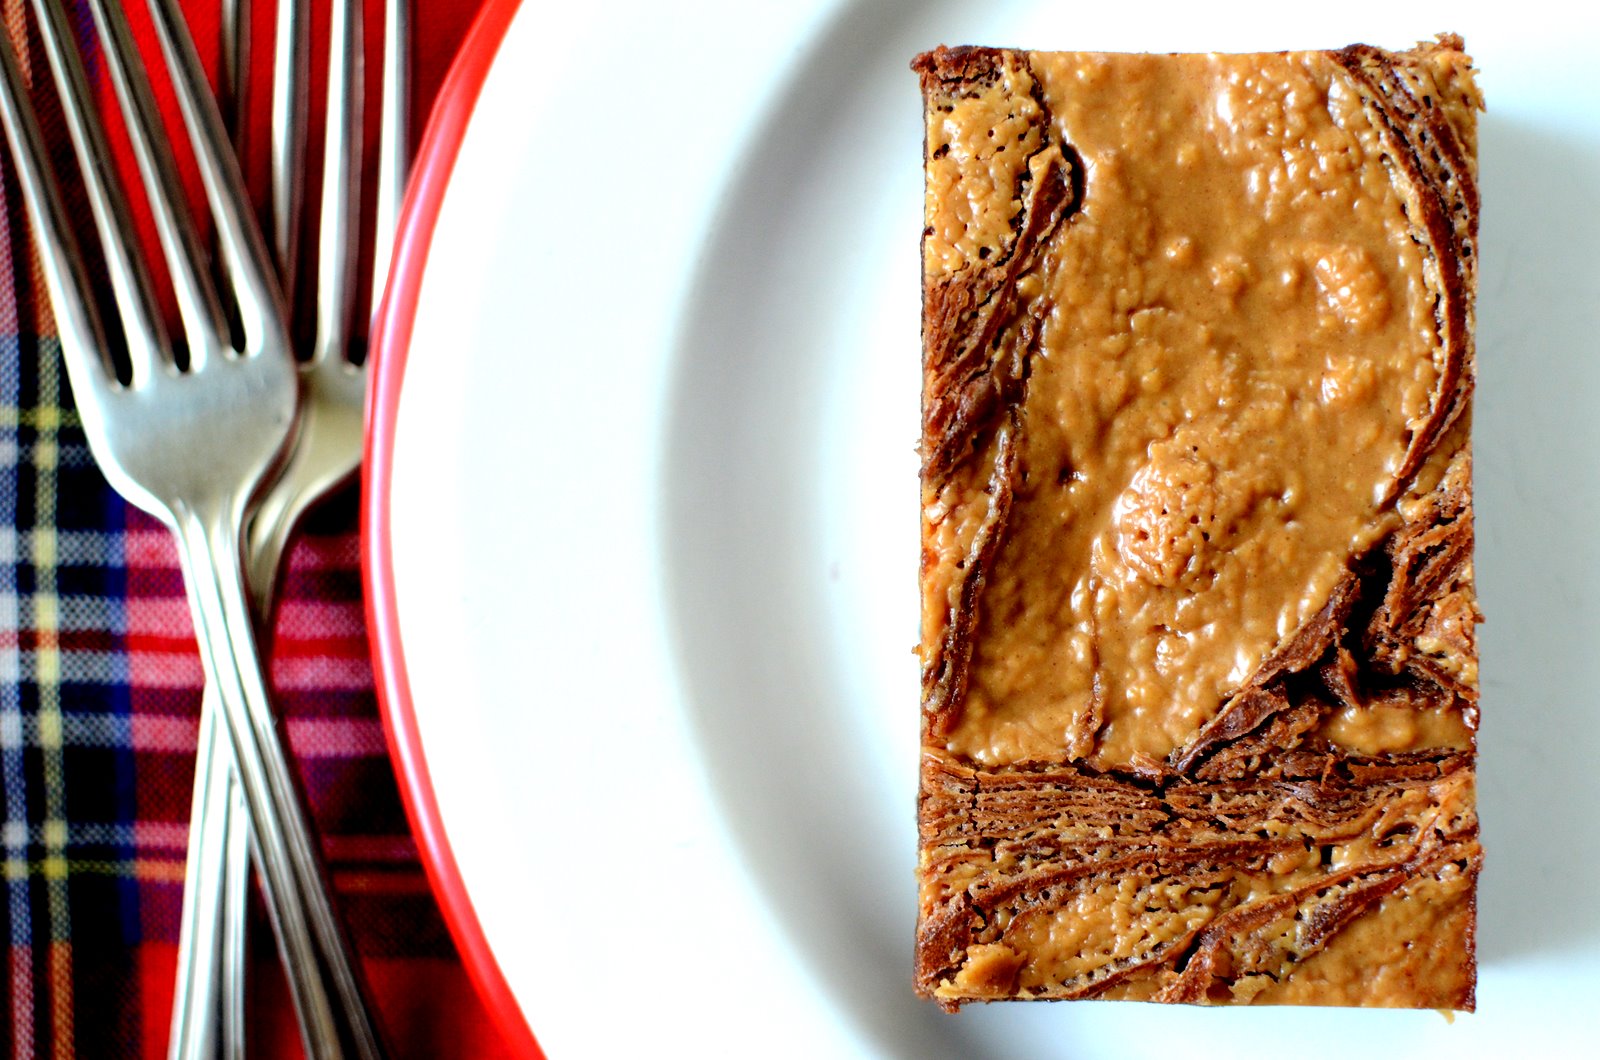
It has been about 10 months since Cheryl joined the IPC kitchen staff and it's been my joy to watch her grow in her culinary skills, especially in baking. She has taken the initiative to seek out recipes and be in charge of baking Wednesday noon service lunch desserts.


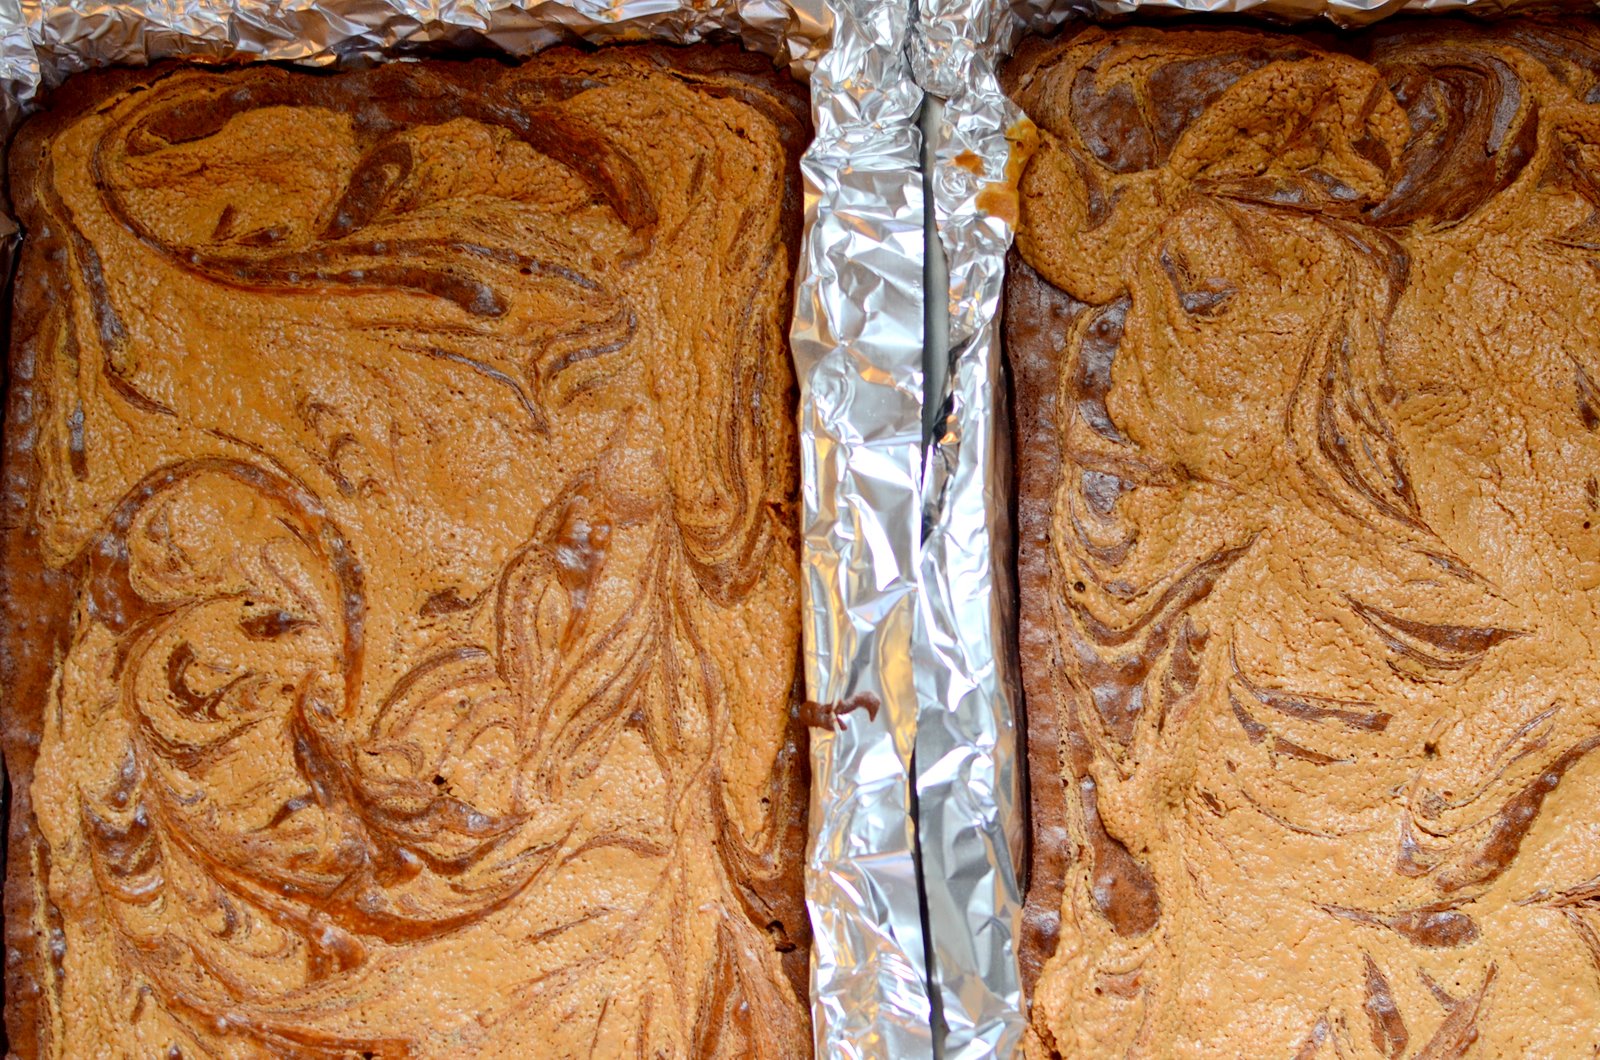
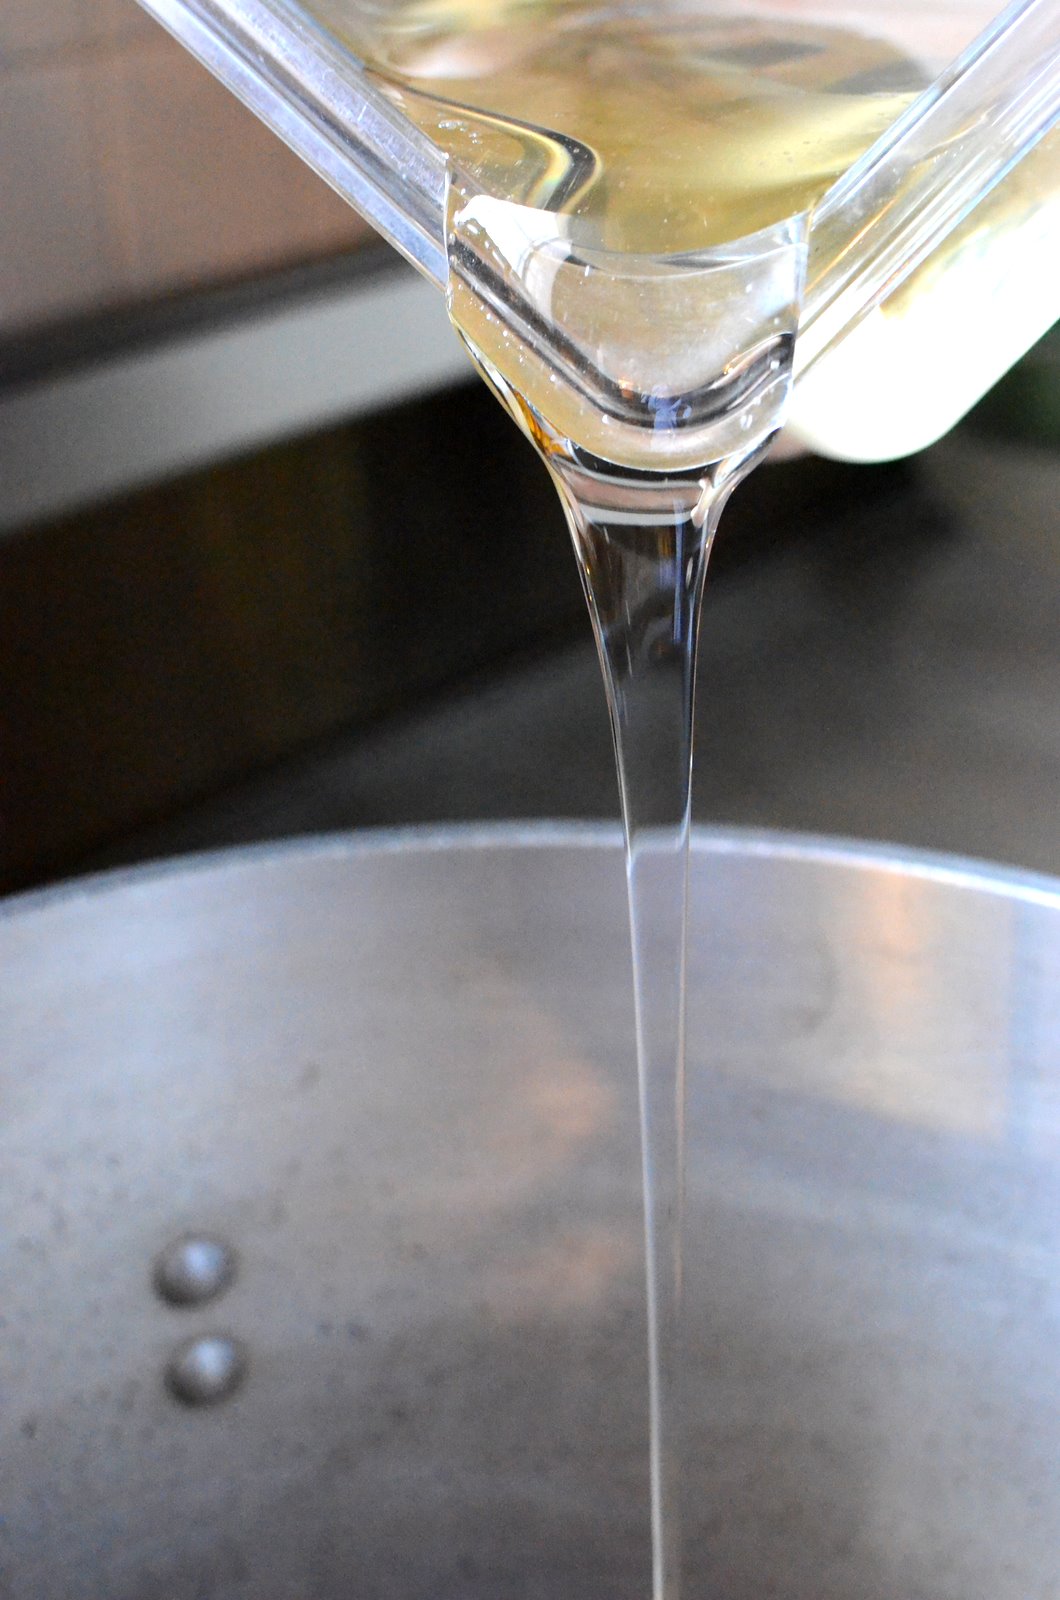
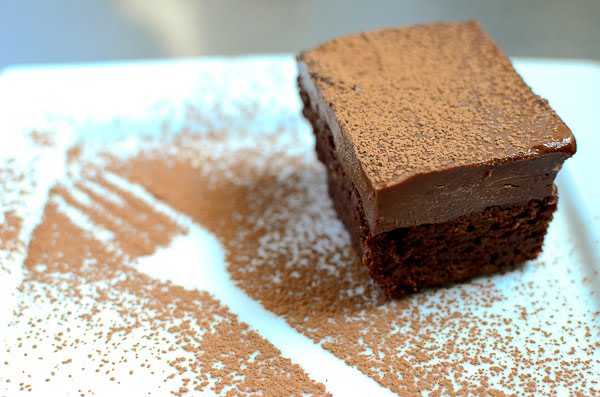
When I walked into the kitchen later than my usual time today, this is what I found. Most gorgeous peanut butter swirl brownies I have ever seen! I am just kicking myself that I wasn't there to take the prep photos to share with you.


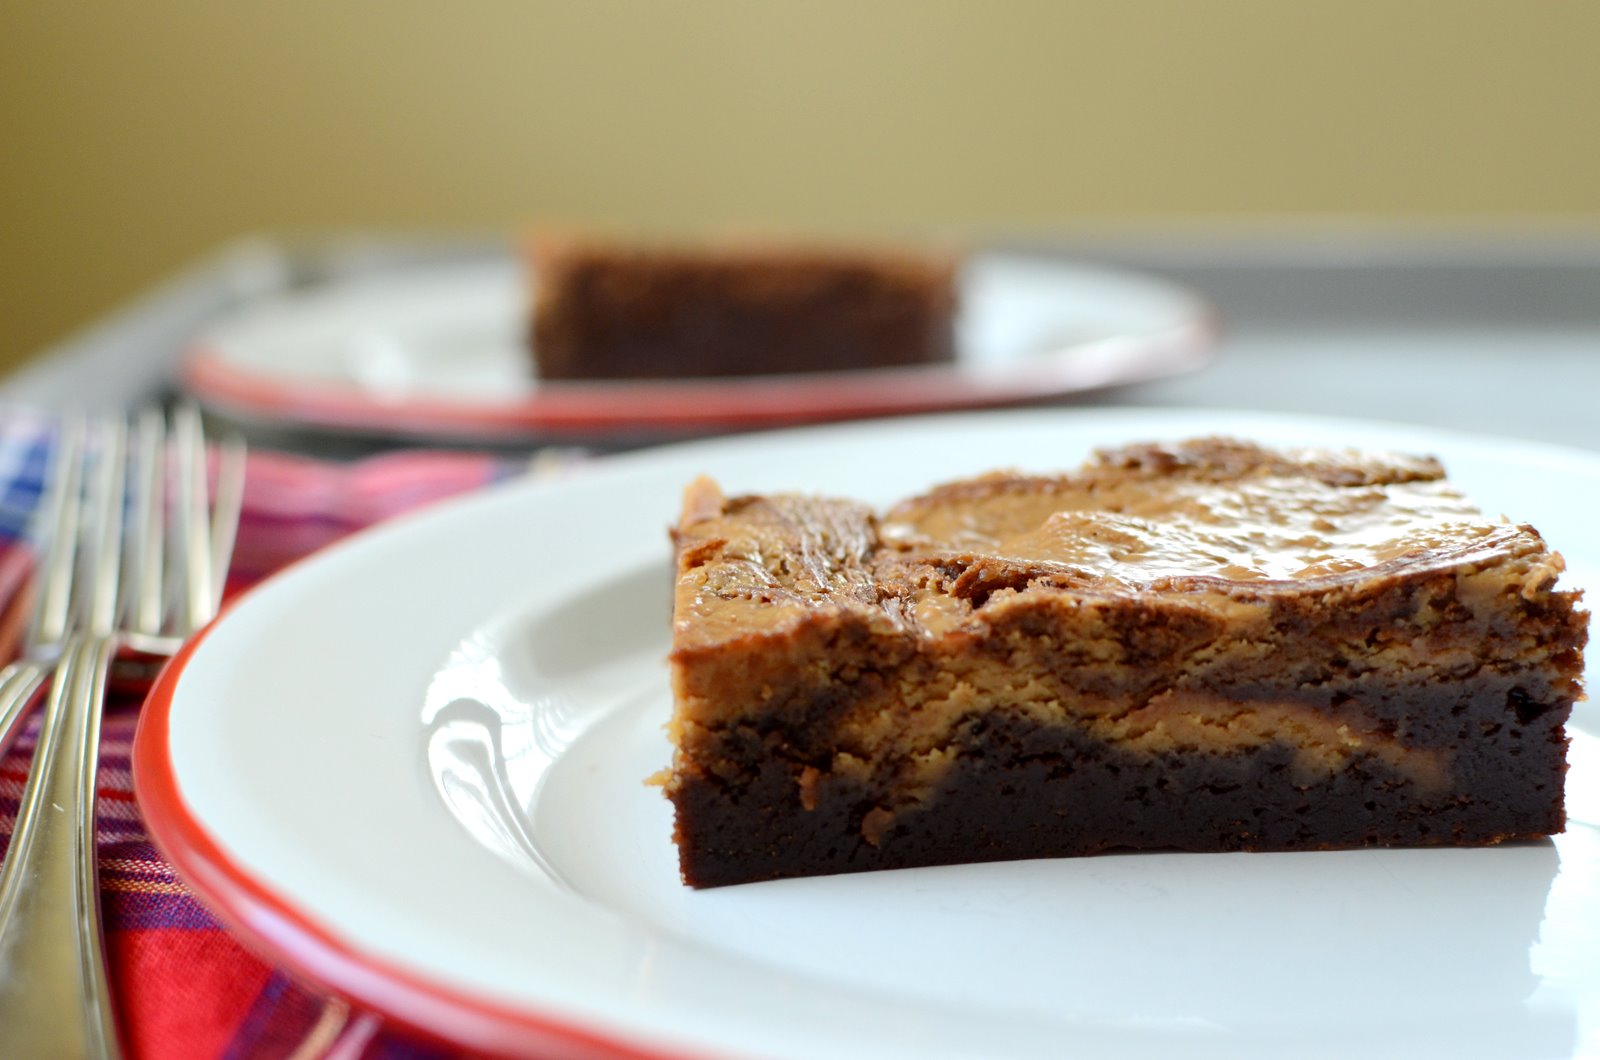
But I know these finished photo shots will make you want to make these right now. And you should. It's wonderfully moist and yummy. You'll never go back to ol' regular brownies again.

Print This Recipe!

Peanut Butter Swirl Brownies

For the Brownies

1¼ cups all-purpose flour(6.25 oz)
1 teaspoon salt
2 tablespoons dark unsweetened cocoa powder
11 ounces dark chocolate, coarsely chopped
1 cup (8 ounces) unsalted butter, cut into 1-inch pieces
1 teaspoon instant espresso powder
1½ cups granulated sugar (10.5 oz)
½ cup packed light brown sugar (3.5 oz)
5 eggs, at room temperature
2 teaspoons vanilla extract

For the Peanut Butter Swirl

½ cup (4 oz) unsalted butter, melted
1 cup powdered sugar (4 oz)
1½ cups creamy peanut butter (12 oz)
½ teaspoon salt
1 teaspoon vanilla extract


1. Preheat the oven to 350. Criss-cross two sheets of heavy duty aluminum foil and line 13x9x2 baking pan. Lightly spray with oil spray.

2. In a medium bowl, whisk together the flour, salt and cocoa powder. Set it aside.

3. Place the chocolate, butter, and espresso powder in a large heat-proof bowl. Set the bowl over the saucepan of simmering water. Stir the chocolate/butter mixture occasionally until completely melted and smooth. Turn off the heat, but keep the bowl over the water. Add the sugars and whisk until completely combined. Remove the bowl from the pan. The mixture should be room temperature.

4. Add eggs and vanilla extract to the chocolate mixture and whisk until just combined. Do not over mix.

5. Using a rubber spatula gently fold in flour/cocoa powder mixture into the chocolate until just combined. Pour the batter into the prepared baking pan. Use a spatula to smooth the top.

6. In a medium bowl, whisk together the peanut butter swirl ingredients. Using a spoon or a tablespoon scoop, drop dollops of the peanut butter mixture over the top of the brownie batter. Using a butter knife, swirl the peanut butter and chocolate together, running the knife through the two batters. Smooth the top.

7. Bake for 30 minutes in the center of the oven, rotating the pan halfway through the baking time, until a toothpick inserted in the center of the brownies comes out with a few moist crumbs sticking to it.

Let the brownies cool completely. Lift the brownies out of the pan using the foil handles. Cut into squares and serve.

Store at room temperature in an airtight container for up to 3 days.

Note: 12x24x2 steam pans can be used for large volume baking, double the recipe which yields 32 squares each pan.

8.24.2011

Shrimp, Chicken, and Sausage Gumbo for 300


This is one of my church family's favorite meal all year around. This recipe is much simpler than my previous recipe post. (Do you see how much improved the photos are?) With some prep work ahead, this gumbo is very quick and inexpensive meal to prepare for a large group and you can even splurge a little by adding jumbo shrimp. Sorry that I didn't have the time to convert the recipe to a smaller quantity for home cooks. I hope to do that for you next time I make this delicious one-pot meal.


Up to three days ahead, sausage can be sliced, onions and chicken meat diced. See how we store prepped foods in Ziplock storage bags? It saves so much room in the refrigerators and makes a clean up a snap. These sweet red peppers were cored and ready for quick chopping.


Shrimp is peeled, layered between the plastic films, and frozen several days/weeks ahead. The best way to quickly thaw frozen shrimp is to run cold water over in a large colander


Red pepper flakes, dried oregano, and dried basil is quickly sauteed with olive oil.


Then diced and onions and peppers are added and then minced garlic. Add diced chicken and sausages.


Homemade chicken stock is made from carcasses of rotisserie chickens up to three days and refrigerated. Solidified fat can be skimmed off. Add the broth, canned crushed tomatoes and diced tomatoes. Bring it to simmer then add the roux.


Simple white or blonde roux is made with butter and flour to thicken the gumbo. A few photos are missing for adding crushed tomatoes; I got too busy with the food prep.


Simmer for a few hours, add shrimp and fresh chopped basil five minutes before serving. Serve with steamed rice and your favorite hot sauce. I always set some aside without shrimp for non-seafood eaters!

Print This Recipe!

Shrimp, Chicken, and Sausage Gumbo for 300
Yields about 54 quarts = 216 cups
Served over rice, about 1/2 to 3/4 cup per person

12 Rotisserie Chickens(traditional flavor, do not buy lemon pepper or BBQ), skinned, de-boned, meat cubed into bite size
15-16 quarts of chicken stock made from chicken carcasses
3/4 cup of olive oil, divided
3 heaping tablespoons EACH red pepper flakes, dried oregano, dried basil (divided)
8 large onions, diced
6 lbs of Red Sweet Peppers, shown above or 12 red bell peppers, cored, diced
20 large cloves of garlic, finely chopped in food processor (with a bit of kosher salt, makes it finer)
3-#10 cans of crushed tomatoes
2-#10 cans of diced or whole tomatoes (use immersion blender to blend)
24 lbs of smoked beef sausages (used Eckridge brand), sliced 1/2-inch thickness
2 lbs of unsalted butter
4 cups of all-purpose flour
15 lbs of shrimp, 21-25 count, peeled
1 1/2 cup of chopped fresh basil
Red chili garlic sauce or Sriracha to taste (I usually have this available at the table)


1. Using three 20-quart stock pots, heat olive oil (1/4 cups each pot) and saute red pepper flakes, dried oregano, and dried basil for 30 seconds until fragrant. Add diced onions and sweet peppers for about 3-4 minutes. Add garlic to stir.

2. Divide and add 15 quarts of homemade chicken stock (see note below), add sausage and diced chicken meat. Divide and pour canned crushed tomatoes and pureed diced tomatoes (for fresher tomato flavor; do not use all crushed tomatoes)

3. Add prepared diced chicken and sausage. While the liquid is coming to a boil, make white/blonde roux. In a large cast iron pot, melt 2 pounds of butter until frothy, add 4 cups of all purpose flour. Stir constantly incorporating the flour until well blended, about 4-5 minutes. Here is a great how-to video clip from Chef Susan.


4. When gumbo begins to simmer and liquid is hot, divide and add the roux to the pots. Be careful, not to burn yourself! Stir well. Bring it to boil, then turn down the heat low and let simmer for about two hours, stirring occasionally. About 5 minutes before serving add prepared shrimp and fresh chopped basil, stir to cook. Serve with steamed rice and hot sauce on the side.

Since sausage has enough salt, I do not add salt other thana little kosher when grinding/processing the garlic cloves.

Up to several weeks ahead:
*Peel shrimp, in half steam pans, aligned them in rows, layer plastic films between layers. Wrap well and freeze.

Up to three days ahead:
To make chicken stock (stock and diced chicken can be frozen weeks ahead, if need be, as well)

*Debone, skin rotisserie chickens (easier when still warm); discard all skin,
*Bones in two large stock pots and add about 30 quarts of water and boil until reduced to 20 quarts (onions, celery, bay leaf can be added, optional), cool completely and cover and refrigerate
*Chop white and dark meat to bite size, store in zip lock baggies, refrigerate
*Dice onion, bag, and refrigerate
*Dice sausage, bag, and refrigerate
*Core and wash sweet peppers, dry, bag and refrigerate

On the day of serving:
4 hours prior:
*Dice sweet peppers
*Process garlic with 1 tablespoon kosher salt to grind garlic to finer texture, set aside
*Thaw frozen shrimp by placing shrimp in a colander in a sink with running water; when completely thawed, drain well, set aside in fridge until needed
*Skim and discard solidified chicken fat from stock
*Chop fresh basil, set aside
*Follow above instructions for cooking
*5 minutes prior to serving, add shrimp and fresh chopped basil

*Most ingredients were purchased from Sam's Club

8.17.2011

Peanut Butter Rice Crispy Bars


Here is a simple no-bake dessert that my church family love. An upgraded rice crispy treats with peanut butter, peanuts, and chocolate glaze! I multiplied the recipe one too many time, so bars are piled too high which made it hard for older diners to eat. But everyone loved the taste and wonderfully crunchy texture.


Corn syrup binds the cereal and keeps the texture crispy.


For quick crushing of nuts, we put them in ziplock baggie and gently tap them with a rubber mallet.


After warming peanut butter mixture, add the rice crispy cereal and peanuts.


When making a large volume, apply oil spray on latex gloved hands to mix cereal and peanut butter mixture.


Halve the mixture and press it down. Sprinkle chips of your choice, we used both peanut butter chips and semi-sweet chocolate chips, then add the remaining mixture. Press down the mixture into the pan.


Drizzle melted chocolate and let cool completely before cutting into bars.

Print This Recipe!

Peanut Butter Rice Crispy Bars

1 cup packed light brown sugar (7 oz)
1 cup light corn syrup (8 oz)
1 cup peanut butter (8 oz)
1 cup salted dry-roasted peanuts, chopped (4 oz)
6 cups Rice Crispy cereal ( 6 oz)
1 cup peanut butter chips or semi-sweet chocolate chips
1 cup semisweet chocolate chips, melted in microwave 30-60 seconds


1. Grease 13- by 9-inch baking pan. Bring sugar and corn syrup to simmer in large pot. Off heat, add peanut butter and peanuts, stirring until smooth. Add rice crispy cereal and stir until incorporated.

2. Scrape half the mixture into prepared pan and press into bottom and corners with greased spatula (or with greased gloved hands if making a large volume). Sprinkle peanut butter chips or chocolate chips, if using. Add the remaining mixture, pat the mixture down. Drizzle melted chocolate over top and spread to cover. Let cool completely, about 30 minutes. Slice and serve. (Bars can be stored in airtight container for 2 days.)

Note: Recipe times 2 for 24x12x2 steam pan, which yields 32 bars

8.15.2011

Sunday Dinner (Communion Season 2011)


What a great way to end our Annual Communion Season with a thought provoking sermon by Dr. James Baird followed by a good ol' Southern pork barbeque! I chose the barbeque because it is so tasty and very inexpensive option to serve my large church family.


I purchases 13 pork shoulders which already smoked/grilled from my local Piggly Wiggly grocery store in Pooler, GA for $17 each(7-8 pounder). OK, I'm a food snob and very picky when it comes to purchasing already cooked foods. But Mr. Marvin at Pooler Piggly Wiggly does a fantastic job grilling these pork shoulders and I am always very confident to serve these. If you don 't grill or don't have the time to grill, look for a place who can do the job for you.

These shoulders are double wrapped in foil, then baked for additional 4-5hours in low heat for easy chopping.


Cheryl, my young kitchen staff is a great softball player, and I am so happy to have her arm strength to chop 13 of these. That's 90 pounds of meat. Yeah, don't mess with Cheryl when she has the cleaver in her hand.


Working in a commercial kitchen is not for the weak. And this is one of many ways I get my daily exercise. These canned beans are opened upside down for a reason. At the grocery store the cans are stored right side up, which causes the beans to settle to the bottom and liquid on top. It's easier to pour the beans out of the cans when bottom lid is opened.


Along with canned baked beans, I added sauteed onions, bacon bits, cooked black and red kidney beans and extra sauce made with ketchup, Worcestershire sauce, and brown sugar. Click here for the recipe.


Simple Lemon Coleslaw made with white cabbages and tri-colored peppers. Here is the recipe.


And for dessert, we made simple caramel cakes. I adore caramel sauce; butter, heavy cream, and brown sugar, what's not to like?


Simple yellow cake drizzled, no, swimming in caramel sauce was so delicious!


Thanks to Dr. James Baird's great teaching and preaching this weekend, our souls were well fed! And it was an honor for my kitchen staff and I to be part of serving Dr. Baird and this wonderful congregation.

Sunday Fellowship Dinner Menu
For 300

Pork BBQ (13 pork shoulders, 90 pounds); 1 1/2 gallons of BBQ sauce (Cattleman's Tangy Gold)
Lemon Coleslaw (25 lbs of cabbage, 12 tricolor peppers); shallots omitted
Three Bean Casserole (5-#10 cans canned beans, 6 lbs dried black beans cooked, 4 lbs dried kidney beans cooked, 6 lbs of bacon cooked & chopped, 4 large onions sauteed)
Garden Salad with Ranch Dressing (30 heads of Romaine, 4 lbs of cherry tomatoes, 4 English Cucumbers, 12 cups of ranch dressing)
Watermelon slices (4 large melons, sliced)
Caramel Cake (5 full size pans = 225 pieces)
Chicken Nuggets for babies (8 lbs frozen nuggets heated)
**since we have so many babies/toddlers, we always serve either chicken nuggets or corn dogs

General Prep List

A week prior:
Order pork shoulders
Make cakes and freeze (only the cake, caramel sauce is made later)

3 days prior
Julienne cabbages, store in zip lock baggies, refrigerate
Bell peppers, halved, cored, store in zip lock baggies, refrigerate
Make Ranch Dressing
Cook black beans, red beans (soak them the day before)
Slice bacon and cook until crisp, cool and store in baggies then refrigerate
Saute chopped onions in a little bacon fat, cool, store in baggies, refrigerate
Make bean sauce, baggie, then refrigerate
Measure caramel sauce ingredients store in fridge or leave room temperature covered
Juice and zest lemons, bag and store in fridge

On the day of event:
7 hours prior
Bake pork shoulders in oven 325 degrees F. until well heated through and shoulder bone fall off the meat
Lightly salt sliced cabbages with salt, set it in colander for about an hour
Make coleslaw dressing
Assemble baked beans, add sauce
Wash and julienne colored peppers
Thaw cakes


4 hours prior
Wash cabbage in cold water, let water drain completely, paper towel dry, add dressing and toss with peppers, let flavor meld for several hours
Make caramel sauce
Cut cake and drizzle caramel sauce; let cool
Make tea concentrate

2-3 hours prior
Bake bean casserole
Cut and wash romaine, prep salad
Chop pork shoulder, cover with foil and keep warm
Slice watermelon, cover with plastic wrap

1 hour to serving
Heat BBQ sauce
Toss coleslaw a few times
Toss salad (15 minutes before serving)
Table set up

Note: Every group, depending on the age, will eat more or less than my church family. You will need to adjust the amount for your own group you are serving. For more info on cooking for a big group, read "Event Planning" and "Cooking Tips" in this blog. If you have any questions, please don't hesitate to email me. :)

8.13.2011

Saturday Dinner (IPC's Communion Season 2011)


Though this was a relatively simple menu with much of the prep work done ahead, the kitchen staff and I were moving a bit sluggish this afternoon. We felt the fatigue settling on our bodies serving dinners three nights in a row. I had to have some caffeinated drink to perk me up and it sure worked, now I am WIDE awake and it is way past my bed time! Here is what we did.

Boneless, skinless chicken breast is lightly dusted with herb dry mixture of dried oregano, basil, parsley, granulated garlic, pepper, and kosher salt, then seared on a hot griddle. Finish baking in oven until internal temperature reaches 155-160 degrees F. Let meat rest 25-30 minutes before slicing.


Here is a quick way to prep romaine lettuce for salad. Hold by the root end , chop into bite size, then wash the lettuce; drain in a colander.


After water is completely drained, put lettuce and veggies in large bowls and have them ready to toss with dressing. It is important to put just enough of dressing to coat the salad.


Sprinkle cheese on top.


Perfectly cooked pasta for 200? Click here for my previous post. Since angel hair pasta is so easy to overcook in large volume, choose a little thicker pasta such as spaghetti or linguini . After cooking the pasta firmer than al dente, quickly cool in ice cold water, then drain. Add a little of olive oil to prevent from sticking. Cover loosely until ready to serve.


Reserve the water from cooking the pasta, add more water to the pot and keep the water simmering until ready to reheat the pasta. See how I keep the cooked pasta in the metal colander with a deep large pan to fit underneath?


Pour boiling reserved pasta water over the noodles. Stir the pasta for only for about 10-15 seconds. Do this in small batches to reheat the remaining.


My church family love Sister Schubert's yeast rolls! These par-baked frozen rolls can be purchased at Sam's Club. We brush them with melted butter and bake at 350 degrees for 5-6 minutes in the convection oven.


Decadent Chocolate cake with Chocolate Buttercream frosting was made three days ago and frozen.


Simple but delicious Italian meal tonight! OK, one more meal tomorrow.
And my church family is on their own for rest of the week. I'm done. "Io sono finito!"


Saturday Menu:
For 200

Chicken Marinara (48 lbs of chicken breast/16 quarts of marinara sauce/ 20 lbs pasta)
Yeast Rolls (Sister Schubert's 190 rolls)
Greek Salad (30 heads of romaine/4 lb.cherry tomatoes, 3 English Cucumbers/3 red onions/3 lbs olives/5 lb feta cheese
Chocolate Cake with Chocolate Buttercream Icing (4 full pans, 180 servings, not everyone eat dessert)

General Prep List:
**Marinara sauce and chocolate cake can be made and frozen weeks ahead
**Greek salad dressing can be made and refrigerated a few weeks ahead

On the day of serving:

6 hours prior
Thaw chocolate cake, uncover the wrap or foil so ice crystals on the wraps don't fall on the icing

4 hours prior
Cook pasta firmer than al dente, cool, set aside loosely covered, reserve pasta water & keep hot
Slowly reheat marinara sauce (we reheat sauce in a steamer)
Prep salad
Herb dry rub on chicken and sear until lightly blackened

2 hours prior
Baked seared chicken in oven 12-18 minutes until internal temp reaches 155-160 degrees F
Let meat rest and slice against the grain, loosely cover and keep room temp
Cut Cake
Yeast rolls on sheet pans, brush with melted butter

1 hour prior to serving
Salad ready to toss, mix with dressing 15 minutes prior to serving
Heat pasta in batches by pouring boiling reserved water
Plate cakes
Plate salad
Begin plating main dish, serve with shredded Parmesan cheese


8.12.2011

Friday Dinner (IPC's Communion Season 2011)


Unintentionally, I have created ethnic menus for IPC's First Annual Communion Season meals. Last night was Caribbean style dinner, and tonight, Asian.

I have been wanting to make Bulgogi, Korean style stir-fried beef, for my church family for a long time but never did due to high cost of beef, until now! Through a good friend, I was able to get 70 pounds of top round, sliced thinly enough to be used for Korea's most famous beef dish. Thank you, Sunju!

So, the kitchen staff and I made a bathtub-ful of soy marinade with fresh garlic, sesame oil, brown and granulated sugar, pepper, and a splash of white wine.


This is the way my kitchen staff and I get a good bicep work out. Wrestling with half a calf makes you strong.


When using less tender cut, hot, quick stir fry is the key to keeping the beef moist.


Bulgogi can't be served with long grain rice, no sirree! Short grain, sushi grade rice must be used when serving this wonderful dish. Rinse away the starch from the grains a few times with cold water.


Along with this, we also prepared stir fry veggies of Chinese cabbage, white cabbage, zucchini, bell peppers, and mung sprouts.


Mandarin orange segments were used for Spinach Salad with candied walnuts.


And Peanut brittle to top the frozen peanut butter pies.

Cool, smooth frozen pie with crunchy topping was a perfect ending to this delicious meal.


Friday Dinner Menu
For180

Bulgogi with Steamed Rice (70 lbs of top round/35lbs of short grain rice)
Veggie Medley (6 large white cabbages, 5 Chinese Cabbage, 10 lbs zucchinis,
12 tri-color peppers, 10 lbs of mung sprouts)
Teriyaki Sauce (made approx. 1 gallon)
Spinach Salad with Poppy Seed Dressing (10 lbs of baby spinach leaves, 16 cans mandarin orange segments, 2 lbs of Walnuts candied, plus 12 cups of poppy seed dressing)
Frozen Peanut Butter Pie with Peanut Brittle (4 full pans, 180 servings)

General prep list:

Up to 2 weeks ahead:
Make frozen peanut butter pie

Up to 5 days:
Make poppy seed dressing
Make Peanut brittle, store in air tight container in room temperature

Up to 3 days:
Make Teriyaki sauce and refrigerate

1 day ahead:
Marinade beef, refrigerate
Julienne veggies, store in zip lock storage bags, refrigerate

On the day of event:
3 hours before:
steam rice
slowly heat teriyaki sauce
Slightly thaw and cut peanut butter pie, back in freezer

2 hours before: begin stir frying veggie, par cook, layer uncovered

1 hour to serving time
:
one person designated to stir fry beef in batches
Take frozen pie out of freezer 20 minutes prior to serving
toss salad 10 minutes before serving
plate dessert/salad/main meal

8.11.2011

Thursday Dinner (IPC's Communion Season 2011)


It was a great turn out for tonight's dinner; close to 200 as anticipated! It is a great honor to have such a dynamic preacher/speaker such as Dr. James Baird and so many families came to hear him.

I should have made a little more black beans and rice (I put Tilapia on a bed of salad for those few who did not get rice), and Tropical Salsa, but over all everything went very smoothly.

Rice was cooked with garlic, onions, and chicken broth. Then cooked black beans were added with a bit of ground cumin and cayenne pepper.


Two hours prior to serving, dry rub was sprinkled on the Tilapia filets...

and par-cooked. On a high heat sear and blacken one side of filet and put on a full-size sheet pans. And 10 minutes prior to serving, bake at 400 degrees F. for 6-7 minutes.


Tropical salsa which had papaya, pineapple, jalapeno, fresh lime juice, chopped cilantro, and Thai red chili sauce was made a day ahead.


Coconut-Kiwi cake was made a day ahead too, then garnished with kiwi today.


I think this is one of the best ways to eat coconut!


It was simple but enjoyable meal for my church family. And best of all, hardly any leftover food! Yes!


I will post the recipes later for you, I pinky promise! Tell me which one you want me to post first.

Thursday Dinner

Blackened Tilapia (50 lbs of 5-7 oz portion filets, some cut in half)
Blackened Chicken (6 lbs for small children and for non-seafood eaters)
Tropical Salsa (12 pineapples, 8 papayas, and other ingredients
Black Bean and Rice (4 full size steam pans)
Garden Salad with Sundried Tomato-Basil Vinaigrette (3o small heads of Romaine Lettuce,
3 English Cucumbers, Cherry Tomatoes)
Coconut-Kiwi Cake (4 full size pans, 180 pcs)

Now, many little details are omitted here on this prep list but you get an idea how we do things in our kitchen when serving a meal like this.

Up to 5 days prior to serving:
Make Salad Dressing

One day before serving:
Make Tropical Salsa and refrigerate
Make Coconut-Kiwi Cake and refrigerate (without Kiwi garnish)

Five hours prior:
Thaw Tilapia completely in cold water (comes individually wrapped in plastic)
Make Tea/beverage

Four hours prior:
Cut coconut cakes, garnish with kiwi slices, refrigerate until ready to serve
Chop Romaine lettuce, wash & drain, prep cucumbers and cherry tomatoes
Start soaking long grain rice and rinse.

Three hours prior:
Saute minced garlic and onions with olive oil, add drained rice and broth, cook, fluff
Add drained and rinsed black beans (we used dried black beans, soaked and cooked them) to cooked rice, cover with foil and keep warm

Two hours prior:
Sprinkle dry rub, we used 50 lbs of Tilapia so started early

An hour prior to serving:
Begin blackening fish filets, put on sheet pans, preheat oven to 400 degrees F
Salad things out and ready to toss last minute
Beverage station set
Desserts out and ready for plating
Tilapia in oven 10 minutes prior and cooked for 6-7 minutes, in batches since diners come in waves.
Begin plating 5 minutes prior to serving.

And not so fun part.......the clean up!